Mastering How To Twist Hair: Your Guide To Beautiful, Easy Styles
Learning how to twist hair can truly change your styling game. It's a fantastic way to create new looks, keep your hair neat, and even protect it from everyday wear. Think of it, in a way, like turning something, perhaps repeatedly, or wrapping one thing around another, which is precisely what you do with strands of hair. This simple technique, which involves bending or turning your hair to change its shape, offers so much versatility.
For many, hair twisting is a basic skill, yet it opens up a whole world of possibilities for different textures and lengths. You might want a quick, easy style for the day, or perhaps a longer-lasting protective look. Really, the beauty of twisting lies in its simplicity and its ability to transform your hair without needing heat or lots of products. It's a gentle way to manage your hair, too.
Whether you're new to hair styling or just want to try something different, getting good at hair twists is a skill worth having. It's a classic method, yet it always feels fresh and current, offering a timeless approach to managing and styling your strands. So, let's explore how to twist hair and make it work for you.
- How Do I Say Fish In Spanish
- Tanesha Wocktaint Face
- In Korean How Are You
- Ynw Melly Mugshot
- Did Baby Maverick Die
Table of Contents
- Understanding Hair Twists: What Are They?
- Why Learn How to Twist Hair?
- Getting Ready for Your Twists
- Different Ways to Twist Hair
- Step-by-Step: How to Twist Hair
- Keeping Your Twists Looking Good
- Common Questions About Hair Twisting
Understanding Hair Twists: What Are They?
Hair twists are a popular styling method where two or more strands of hair are wrapped around each other to form a rope-like pattern. This is a very old technique, and it's used across many cultures. It's a simple idea, really, a bit like how you might twist a piece of rope or a ribbon. The result is a neat, often textured, look that can last for days or even weeks. So, you are essentially turning and wrapping your hair.
Unlike braids, which usually involve three strands woven over and under, twists typically use just two strands. This makes them, arguably, a bit quicker to do for some people. They can be done on wet or dry hair, depending on the look you want. They're also a great way to stretch hair or create waves when taken out later. This term, "twist," is used in many ways, but here, it's about movement and shape, obviously.
Why Learn How to Twist Hair?
There are many good reasons to get good at hair twisting. For one thing, it's a fantastic protective style. When your hair is twisted, it's less exposed to the environment, which can mean less breakage and damage. This is particularly helpful if you are trying to grow your hair longer, you know?
- Sexiest Man In Miami Florida
- Kendrick Lamar Pants
- 12 Recados Del Dolor
- Whole Foods Vegan Cake
- Human Egg On Finger
Another benefit is how little you have to do with your hair once it's twisted. You can just leave it alone for a while. This low-manipulation aspect is really good for keeping your hair healthy. Plus, twists are incredibly versatile. You can wear them down, put them in a bun, or style them in many different ways. They also make a great base for twist-outs, giving you lovely waves or curls when you undo them. So, it's a skill that pays off.
Getting Ready for Your Twists
Before you even think about how to twist hair, you need to get your hair and your tools ready. Proper preparation makes a big difference in how your twists look and how long they last. It's like preparing for any project, really; having everything in place helps.
Tools You Will Need
Having the right tools makes the twisting process much smoother. You don't need a lot of fancy things, just a few basic items. First, a good comb, perhaps a wide-tooth one, is important for detangling. Then, a rat-tail comb can help you make neat parts in your hair. You'll also want some hair clips to hold sections out of the way, which is pretty helpful.
Next, you'll need a good leave-in conditioner or a moisturizing cream. This helps keep your hair soft and easy to work with. A styling gel or pomade can also be useful, especially for making your twists look neat and last longer. Finally, small elastic bands or hair ties might be needed to secure the ends of your twists, particularly if your hair is shorter. So, these few things are basically all you need.
Preparing Your Hair the Right Way
The way you prepare your hair is, arguably, just as important as the twisting itself. Start with clean hair. Wash and condition your hair thoroughly. After rinsing, apply a good leave-in conditioner while your hair is still damp. This adds moisture and makes detangling easier.
Then, gently detangle your hair. You can use your fingers or a wide-tooth comb, working from the ends up to the roots. Make sure there are no knots or tangles. If your hair is very dry, you might want to lightly mist it with water as you work. This step really helps your twists look smooth and prevents breakage. Apparently, well-prepared hair is much happier hair.
Different Ways to Twist Hair
When you think about how to twist hair, you find there are several popular styles, each with its own look and purpose. Knowing the differences helps you pick the right one for what you want. Each method involves turning and wrapping hair, but the scale and how they sit on the head change.
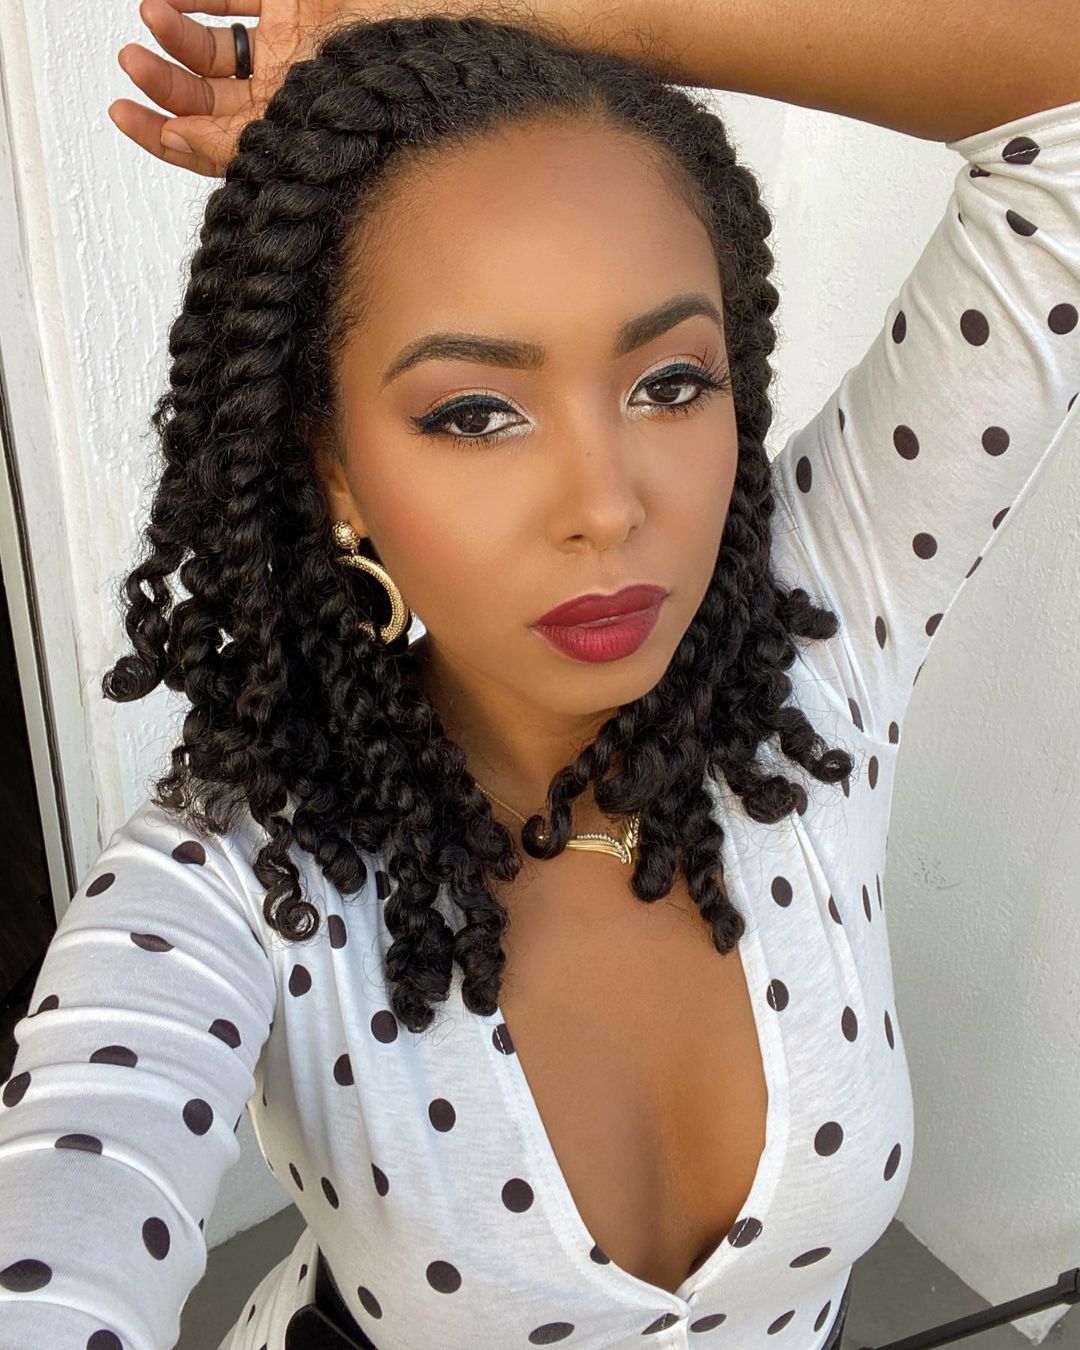
The Classic Two-Strand Twist
The two-strand twist is, perhaps, the most common type of hair twist. It's simple, versatile, and works on almost all hair textures. You divide a section of hair into two parts and then wrap those two parts around each other, from root to tip. This creates a neat, rope-like strand. They can be thick or thin, long or short, depending on your hair and what you want.
These twists are great for protective styling, as they keep your hair tucked away. They're also fantastic for creating twist-outs. When you take them down, you get lovely, defined waves or curls. It's a pretty straightforward method, and many people start their twisting journey here.
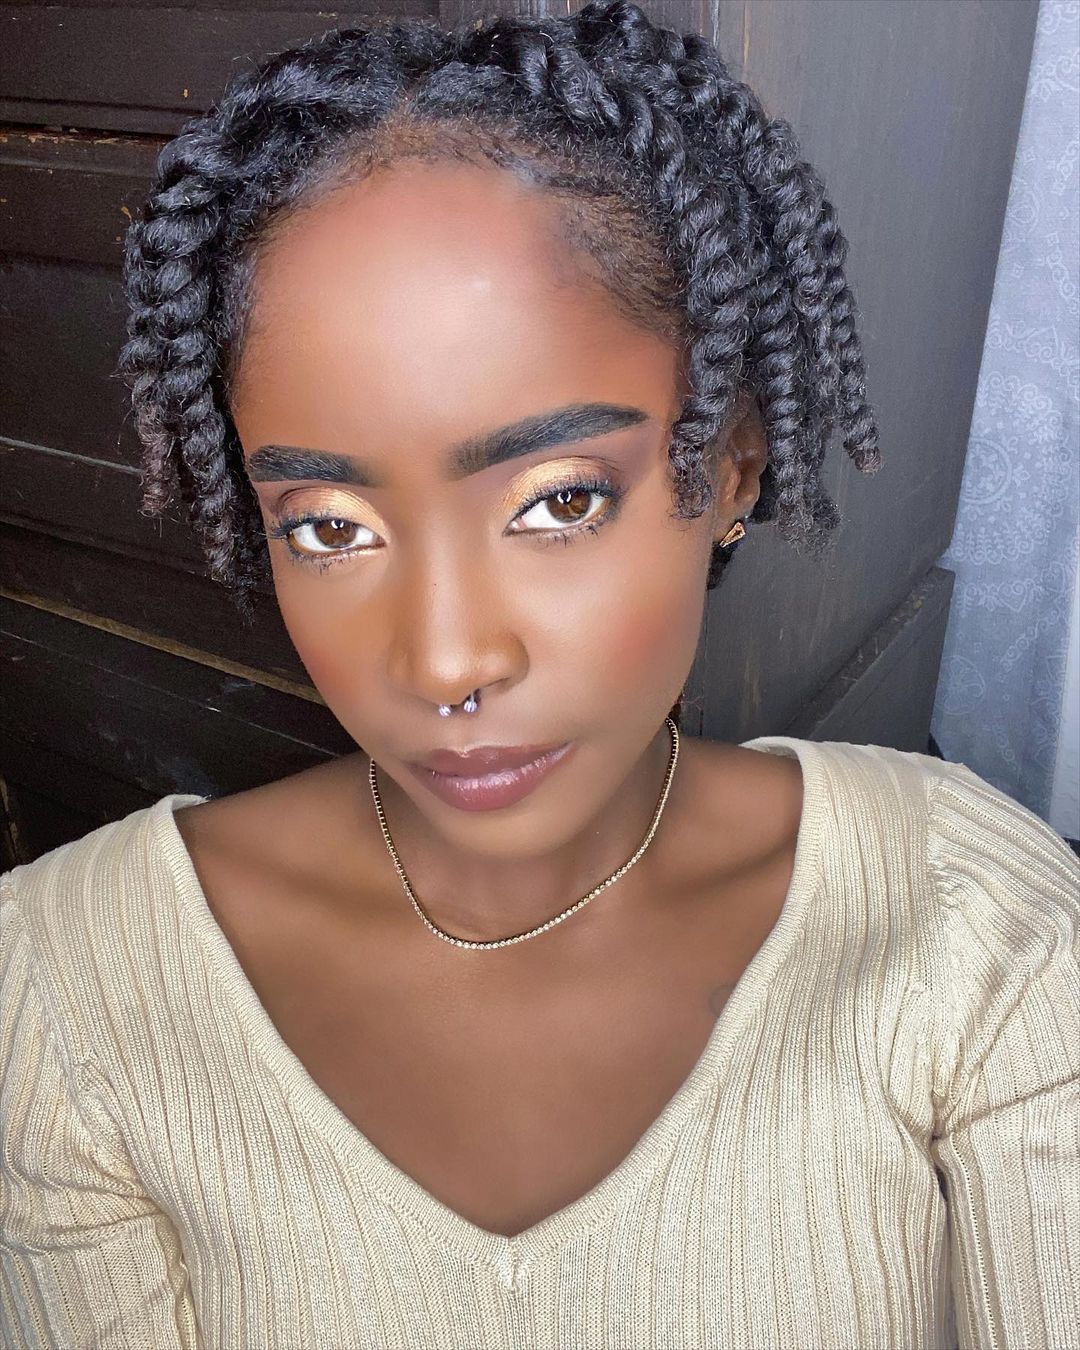
Flat Twists for a Sleek Look
Flat twists are a bit like cornrows, but instead of braiding, you twist the hair flat against your scalp. You start by taking a small section of hair at the hairline and dividing it into two strands. As you twist these two strands, you add small sections of hair from the scalp into each strand, just like you would with a cornrow. This makes the twist lie flat against your head, which is kind of neat.
Flat twists are great for creating updos, intricate patterns, or just a sleek, pulled-back look. They are also a very effective protective style, keeping your scalp accessible for moisturizing. They tend to last a good while and can be a bit more secure than individual twists. So, if you like a neat, close-to-the-head style, this might be for you.
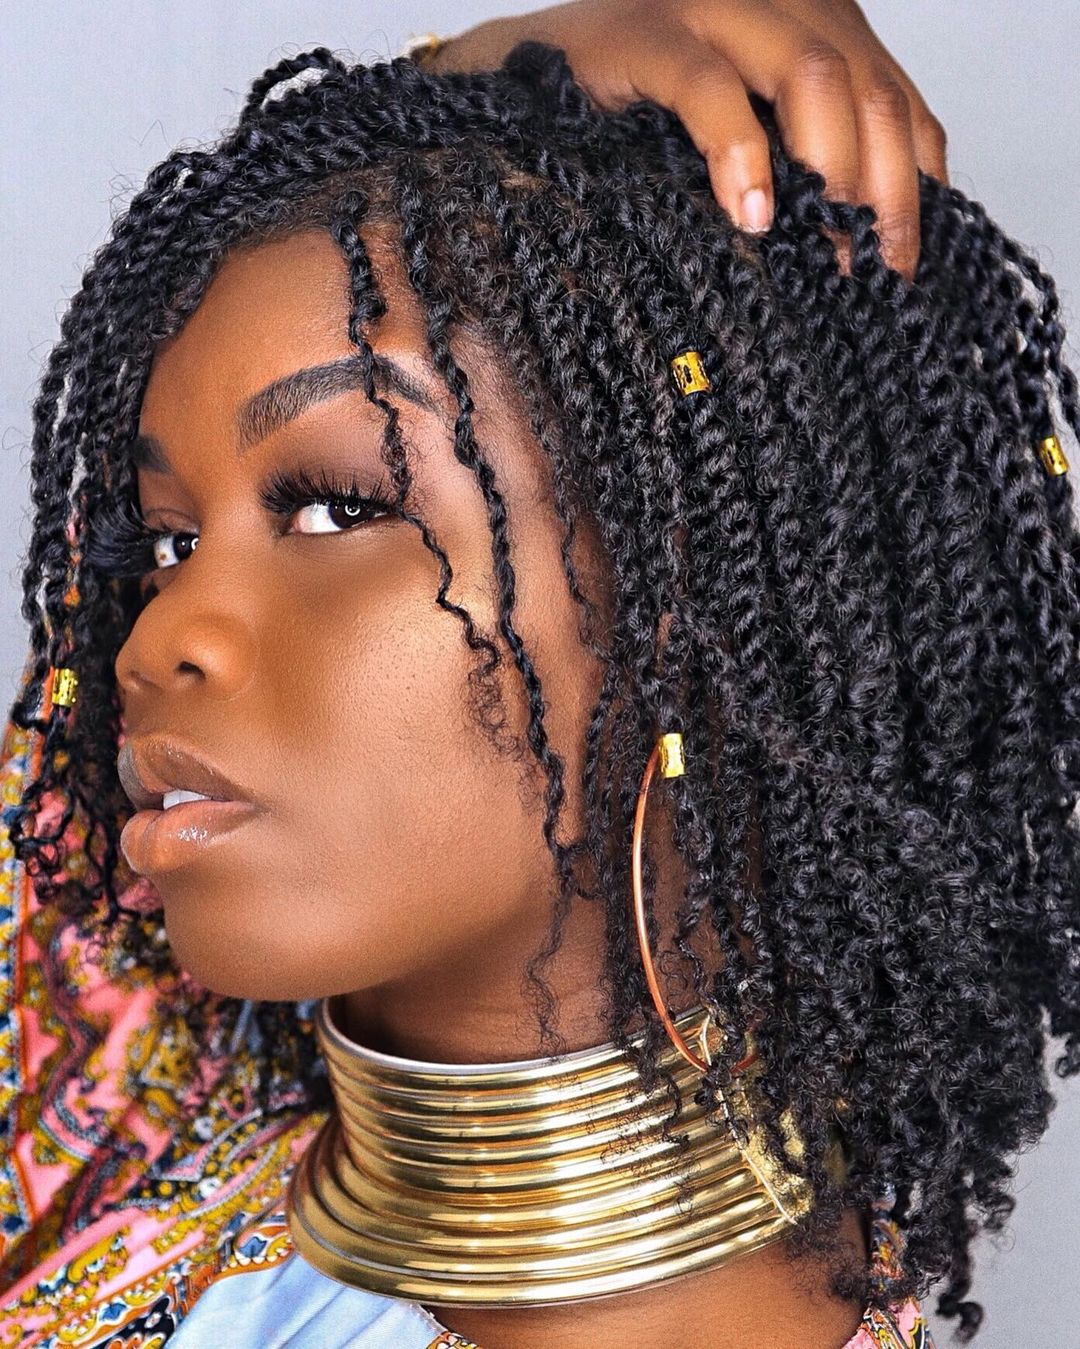
Mini Twists for Fine Detail
Mini twists are, well, just what they sound like: very small two-strand twists. You take tiny sections of hair and twist them individually. This process can take a lot of time, but the results are often worth it. They create a very full, textured look that can resemble loose curls or coils, which is pretty cool.
These tiny twists are excellent for maximizing protection for your hair, as almost every strand is encased. They can also last for a very long time, sometimes several weeks, with proper care. Mini twists offer incredible versatility for styling, allowing you to wear your hair up or down with a lot of movement. They are, admittedly, a bit of a commitment, but they really give a beautiful finish.
Step-by-Step: How to Twist Hair
Now that you know about the different types, let's get into the actual process of how to twist hair. Remember, practice makes perfect, so don't get discouraged if your first few attempts aren't exactly flawless. Just keep trying, you know?
Doing Two-Strand Twists
To start your two-strand twists, first make sure your hair is clean, detangled, and moisturized. You can use a leave-in conditioner and a light oil. Section your hair into manageable parts using your clips. The size of your sections will determine how thick your twists are, so, you know, choose wisely.
Take one small section of hair. Apply a bit more product, like a styling cream or gel, to this section for hold and definition. Divide this section into two equal strands. Now, you will begin to turn and wrap them around each other. Take the right strand and cross it over the left strand. Then, take the new right strand and cross it over the left again. Keep doing this, wrapping the two strands tightly around each other, all the way down to the very end of the hair. Secure the end with a small elastic band if your hair is too short to hold the twist, or just twirl it around your finger to seal it. Repeat this process for all sections of your hair. This is the basic way to twist hair.
Creating Flat Twists
For flat twists, start with well-moisturized hair. Decide on the direction you want your twists to go. Use a rat-tail comb to make a neat part where you want your first flat twist to begin, perhaps near your hairline. Take a small section of hair from the very front of this part.
Divide this small section into two strands. Now, begin to twist these two strands over each other, but as you twist, you'll also add a small amount of hair from the scalp into each strand, just like you would when making a cornrow. So, you twist the two strands, then pick up a bit more hair from the scalp and add it to the strand that's about to be crossed over. Continue this motion, adding hair as you twist, keeping the twist close and flat against your scalp. When you run out of hair to add, finish the rest of the section as a regular two-strand twist. Secure the end, naturally. Repeat for all sections. It takes a little practice to get the hang of adding hair smoothly.
Making Mini Twists
Making mini twists is, in a way, similar to making regular two-strand twists, but the sections of hair you work with are much, much smaller. You'll need a lot of patience for this, as it takes a good amount of time. Start with clean, detangled, and well-moisturized hair. You might want to use a light styling cream or gel for definition.
Take a very small section of hair, perhaps no wider than your pinky finger. Divide this tiny section into two strands. Now, twist these two strands around each other very tightly, from the root all the way to the tip. Make sure the twist is firm and consistent. You will likely not need elastic bands for these, as the small size and tightness usually keep them in place. Repeat this process for your entire head. This can take many hours, depending on your hair density and length, but the end result is a full, textured look that can last for weeks. It's a pretty big project, but very rewarding.
Keeping Your Twists Looking Good
Once you've put in the effort to twist your hair, you'll want to make them last and keep them looking fresh. Proper care is, honestly, key to extending the life of your twists and keeping your hair healthy underneath. You can't just forget about them.
First, protect your twists at night. Wear a satin or silk scarf or bonnet to bed. This reduces friction, which can cause frizz and unraveling. It also helps keep moisture in your hair. Secondly, moisturize your scalp and twists regularly. You can use a light oil or a scalp moisturizer, gently massaging it into your scalp between the twists. This keeps your scalp from getting dry and itchy, which is really important.
Avoid over-manipulation. The less you touch your twists, the longer they will last. Try not to pull or tug on them too much. If a twist starts to unravel, you can often re-twist it. You might also want to lightly mist your twists with water and a leave-in conditioner every few days to keep them hydrated. With good care, your twists can look good for a surprisingly long time. Learn more about hair care on our site, and for more styling ideas, link to this page here.
Common Questions About Hair Twisting
People often have questions when they are learning how to twist hair or considering getting twists. Here are some common ones, with some helpful answers, so you can feel more confident.
How long do hair twists last?
The lifespan of hair twists can vary quite a bit. It depends on several things: your hair texture, how tightly the twists were made, the products used, and how well you care for them. Generally, two-strand twists might last anywhere from one to two weeks. Flat twists often last a bit longer, perhaps two to three weeks, because they are secured to the scalp. Mini twists, because they are so small and numerous, can sometimes last for a month or even longer with good care. It's also about how much you manipulate them, you know?
Can you twist hair with gel?
Yes, you can absolutely twist hair with gel! In fact, many people prefer to use gel, especially for styles where they want a lot of hold and a very neat, sleek finish. Gel helps to smooth down the hair, reduce frizz, and keep the twists looking defined for longer. It's particularly useful for creating crisp parts and for sealing the ends of your twists. Just be sure to use a gel that doesn't leave too much residue or make your hair feel stiff. A little goes a long way, typically.
What's the difference between twists and braids?
The main difference between twists and braids comes down to the number of hair strands used and how they are woven. Braids, like cornrows or box braids, typically involve three strands of hair that are woven over and under each other. This creates a very intricate, interlocked pattern. Twists, on the other hand, usually involve just two strands of hair that are wrapped or turned around each other. This creates a rope-like pattern. Both are great protective styles, but twists are often quicker to install and remove, and they tend to give a different kind of texture when taken out. So, they are similar, but also very different, really.
Detail Author 👤:
- Name : Dax Davis
- Username : zboncak.oma
- Email : norberto.von@kilback.com
- Birthdate : 1975-07-02
- Address : 11358 Hailie Street Friedrichborough, NH 63407-8761
- Phone : (972) 319-0729
- Company : White LLC
- Job : New Accounts Clerk
- Bio : Sit necessitatibus explicabo occaecati velit qui dolor. Commodi facilis non et quaerat cupiditate consequatur. Ut et et cum architecto consequuntur.
Socials 🌐
linkedin:
- url : https://linkedin.com/in/mireille.prosacco
- username : mireille.prosacco
- bio : Magni accusantium adipisci sit.
- followers : 3608
- following : 92
facebook:
- url : https://facebook.com/mireilleprosacco
- username : mireilleprosacco
- bio : Laborum voluptatibus id velit iure. Inventore eos minus omnis.
- followers : 5904
- following : 564
twitter:
- url : https://twitter.com/mireille_xx
- username : mireille_xx
- bio : Sint omnis est neque voluptatum. Totam assumenda qui sit quod inventore sit. Est dignissimos accusamus pariatur incidunt.
- followers : 3707
- following : 2570
